Bike Rack Mounting Instructions

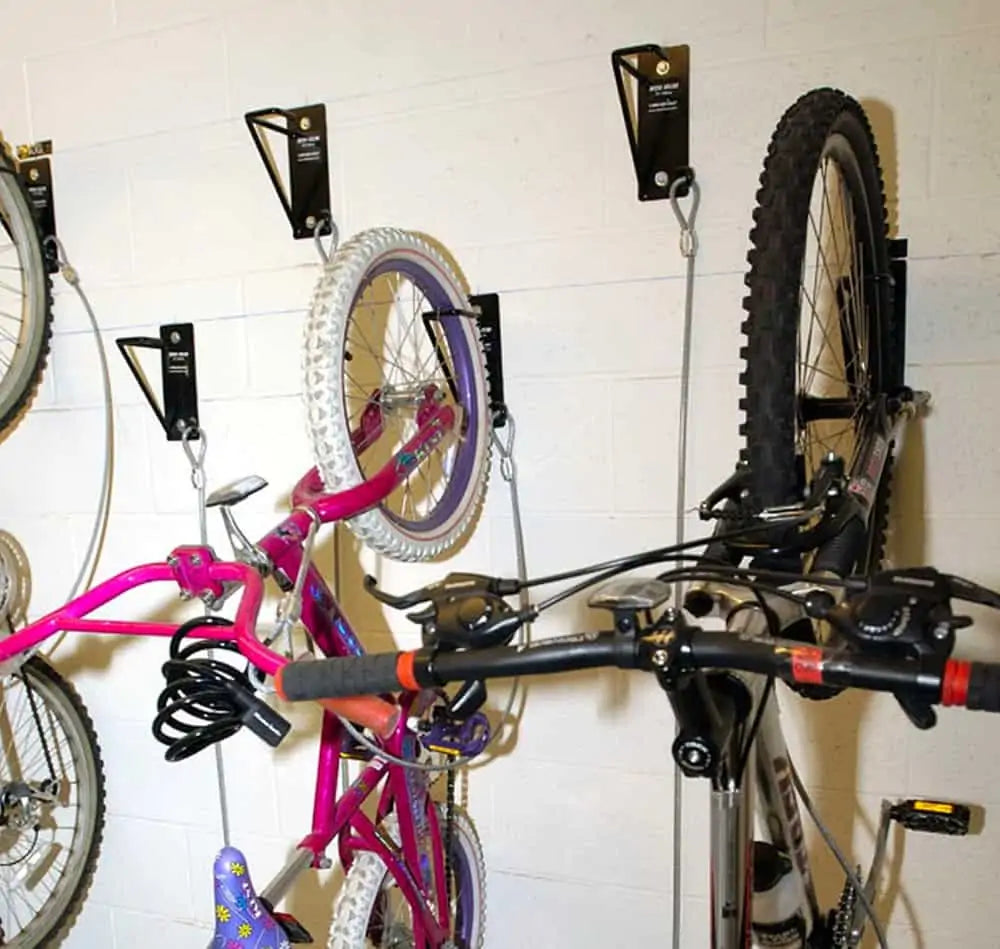
MINI-MUM Bicycle Security Hanger
Mounting Height & Spacing:
Hang all bikes by front wheel: Mount hanger brackets at 5’-8” above floor level at 24” intervals. Hang bikes with front and rear wheels alternating: Mount hanger brackets at 5’-8” at 16 intervals. For maximum density alternate hanger brackets at 5’-8” and 6’-8” at 12” intervals and hang bikes with front and rear wheels alternating (“W” formation).
Access:
Bikes will protrude from the surface of the wall about 40”. A 5’ wide corridor is recommended (3’ minimum) to permit access to bikes. Where bikes will be hung on adjacent walls space must be allocated at corners for access to bikes (6’ – 8’ clear).
Suggested Mounting Hardware (for each hanger, available at hardware stores):
Mounting to Wood:
• 2 – 3/8” x 2” hex head lag screws
• 2- 3/8” flat washers
Mounting to Masonry or Concrete:
• 2 – 3/8” x 2” hex head lag screws
• 2 – 3/8” flat washers
• 2 – lag expansion shields for 3/8” lag screws.
Suggested Mounting Instructions
MOUNTING ON WOOD:
Mount directly to exposed wood beams or anchor where framing studs will support the weight of several bikes. Where framing does not permit installation intervals you want, securely attach a 2 x 10 mounting board horizontally on the wall.
- Mark position of each mounting hole (2 per hanger)
- Drill ¼” diameter hole at each location 1-3/4” – 2” deep. Avoid electrical wiring.
- Line up hanger with mounting holes and screw in top lag screw (with a flat washer next to the head) leaving a little play. Screw in lower screw and tighten both screws.
MOUNTING TO MASONRY OR CONCRETE:
Mount directly on masonry or concrete walls that will support several times the weight of a bike.
- Carefully mark the position of each mounting hole (2 per hanger)
- Drill a 5/8” diameter hole at each location 1-3/4” – 2” deep using a masonry drill. Avoid electrical wiring.
- Slip a lag screw expansion shield into each drilled hole.
Line up hanger with mounting holes and screw in top lag screw (with a flat washer next to the head) leaving a little play. Screw in lower screw and tighten both screws.
Secure A Bike
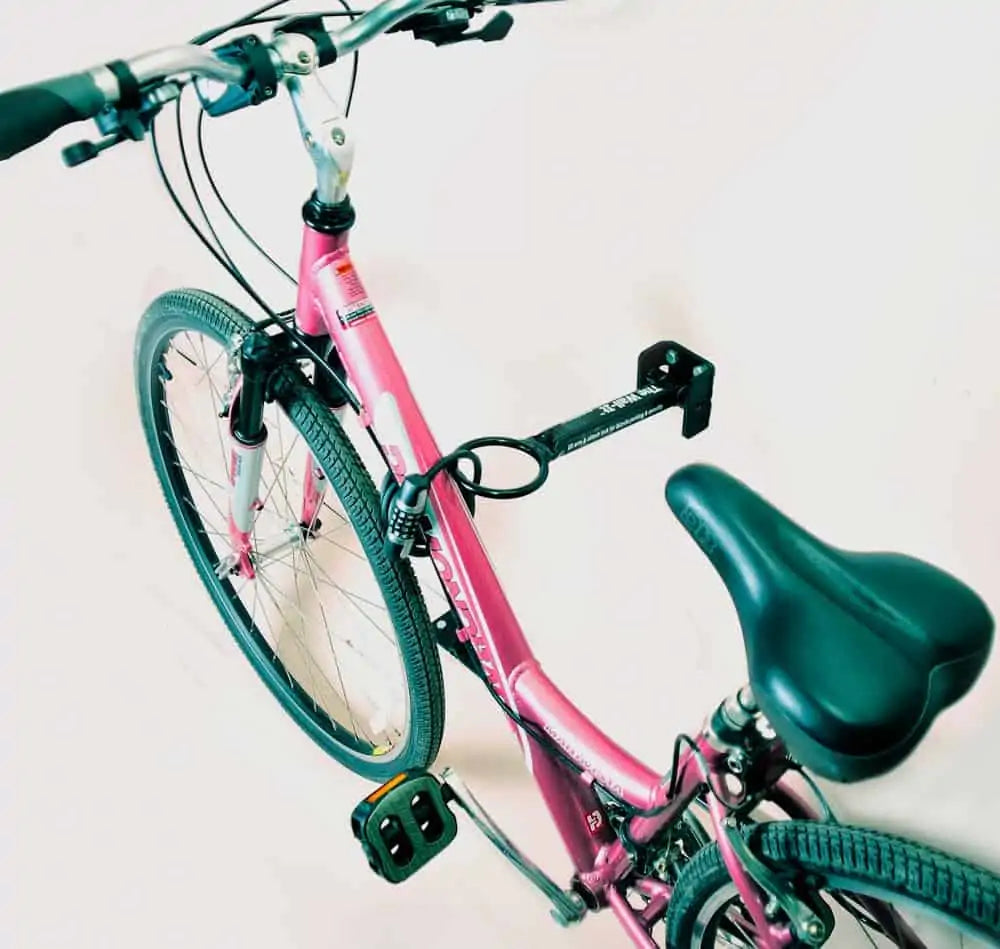
By lifting the front or rear wheel into the recurved hanger bracket. When the wheel is nested in the bracket it will not accidentally fall off the hanger. The angle brace on one side and the security cable attachment loop on the other side help stabilize the wheel, making damage due to twisting unlikely. When the bike is hung the optional attached security cable may be threaded through the upper wheel, the frame, the back wheel, and then secured with a lock back to itself or the bike frame.